


VueJS is an approachable, performant and versatile framework for building web user interfaces. You can hire front-end developers to build reactive web user interfaces.
In this article, we will cover one such interface – a quiz app. Learn how a frontend quiz app can be created using VueJS to better understand what tasks you can hire front-end developers for.
1. Create VueJS app
Step 1: Run vue create quiz-app to create the VueJs app.
Step 2: Run cd quiz-add
npm run serve to navigate to the directory and run the server.

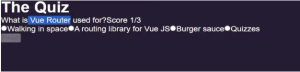
This should be the default screen that pops up.
2. Set Up App.vue
Run:
<template>
<div id=”app”>
<h2>Quiz App</h2>
<quiz @quiz-completed=”handleQuizCompleted” :key=”quizKey” />
<custom-modal
v-show=”showModal”
header=”Congratulations!”
subheader=”You’ve completed your Quiz!”
:score=”score”
@reload=”updateQuiz”
@close=”showModal = false”
/>
</div>
</template>
- The score is a dynamic prop that data characteristics send to the modal.
- Two static props are the header and subheader.
- The custom events that are called from the modal-footer are reload and close.
3. Create the UI and logic code of the modal.
Run:
<template>
<transition name=”modal”>
<div class=”modal-mask”>
<div class=”modal-wrapper”>
<div class=”modal-container”>
<div class=”modal-header”>
<h2> header </h2>
<h3> subheader </h3>
</div>
<div class=”modal-body”>
<div id=”score”>
You responded
<span class=”highlight”>
Math.Ground(
(rating.CorrectlyAnsweredQuestions / score.AllQuestions) *
100
)
% successfully!
</span>
spoke back
<span class=”highlight”>
score.CorrectlyAnsweredQuestions out of
score.AllQuestions
</span>
questions.
</div>
</div>
<div class=”modal-footer”>
<button
id=”play-again”
class=”button-footer”
@click=”$emit(‘reload’)”
>
Play once more
</button>
<button
id=”close-button”
class=”button-footer”
@click=”$emit(‘close’)”
>
near
</button>
</div>
</div>
</div>
</div>
</transition>
</template>
This will create the logic for how many questions the user answered correctly and also assign the total number of questions. The modal-footer will have two buttons emitting custom events to reload and close the modal.
4. Create the quiz component
Run:
<template>
<div class=”container”>
<div class=”correctAnswers”>
you have got
<strong> correctAnswers accurate pluralizeAnswer !</strong>
</div>
<div class=”correctAnswers”>
currently at query index + 1 of questions.Duration
</div>
<h2 v-html=”loading ? ‘Loading…’ : currentQuestion.Question” ></h2>
<!– Only first question is displayed –>
<form v-if=”currentQuestion”>
<button
v-for=”answer in currentQuestion.Answers”
:index=”currentQuestion.Key”
:key=”answer”
v-html=”answer”
@click.Prevent=”handleClick”
></button>
</form>
</div>
</template>
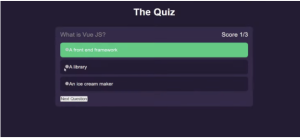
The above code will:
- loading CurrentQuestion.question will check the loading property and determine whether to display “Loading…” or the currentQuestion based on its value.
- Every question’s response will be kept in the array responses. So, using the “v-for” looping function, we will display each answer as a button element. With that, the button will display the response when v-html=”answer” is used.
- The handleClick function, which we’ll see later in the script section, will carry out the logic.
5. Fetch questions
Run:
// Quiz.vue
<script>
export default {
name: “Quiz”,
// data() function stores state variables
data() {
return {
questions: [],
loading: true
};
},
// Custom methods of the Vue Component
methods: {
async fetchQuestions() {
this.loading = true;
// fetch questions
let response = await fetch(“https://opentdb.com/api.php?amount=10&category=9”);
// convert questions to json
let jsonResponse = await response.json();
// manipulate questions
let data = jsonResponse.results.map((question) => {
// put answers on question into single array
question.answers = [
question.correct_answer,
…question.incorrect_answers,
];
return question;
});
// put data on questionnaires property
this.questions = data;
this.loading = false;
},
}
}
</script>
This code will fetch 10 questions at once on each call.
After this you want the Component to fetch and store the data, when the Component mounts.
// Quiz.vue
<script>
export default {
name: “Quiz”,
// data() function stores state variables
data() {
return {
questions: [],
loading: true
};
},
// Custom methods of the Vue Component
methods: {
async fetchQuestions() {
this.loading = true;
// fetch questions
let response = await fetch(“https://opentdb.com/api.php?amount=10&category=9”);
// convert questions to json
let jsonResponse = await response.json();
// manipulate questions
let data = jsonResponse.results.map((question) => {
// put answers on question into single array
question.answers = [
question.correct_answer,
…question.incorrect_answers,
];
return question;
});
// put data on questions property
this.questions = data;
this.loading = false;
},
},
// Code inside mounted() runs after the Component has mounted
mounted() {
this.fetchQuestions();
}
}
</script>
This code uses the mounted() function from Vue’s lifecycle hooks and calls fetchQuestions() from there.
To display current question you can run:
currentQuestion() {
if (this.questions !== []) {
return this.questions[this.index];
}
return null;
},
6. Check correct answer
Run:
checkCorrectAnswer(e, index) {
let question = this.questions[index];
if (question.userAnswer) {
if (this.index < this.questions.length – 1) {
setTimeout(
function () {
this.index += 1;
}.bind(this),
3000
);
}
if (question.userAnswer === question.correct_answer) {
/* Set class on Button if user answered right, to celebrate right answer with animation joyfulButton */
e.target.classList.add(“rightAnswer”);
/* Set rightAnswer on question to true, computed property can track a streak out of 20 questions */
this.questions[index].rightAnswer = true;
} else {
/* Mark users answer as wrong answer */
e.target.classList.add(“wrongAnswer”);
this.questions[index].rightAnswer = false;
/* Show right Answer */
let correctAnswer = this.questions[index].correct_answer;
let allButtons = document.querySelectorAll(`[index=”${index}”]`);
allButtons.forEach(function (button) {
if (button.innerHTML === correctAnswer) {
button.classList.add(“showRightAnswer”);
}
});
}
}
},
This code will set ‘.rightAnswer’ and ‘.wrongAnswer’ accordingly and manage the index state for moving on to the next question.
7. Count correct answers
Run:
CorrectAnswers() {
if (this.Questions && this.Questions.Duration > 0) {
permit streakCounter = 0;
this.Questions.ForEach(characteristic (question) {
if (!Query.RightAnswer)
return;
else if (question.RightAnswer === true) {
streakCounter++;
}
});
return streakCounter;
else {
return “–“;
}
}
8. Calculate score
Run:
score() {
if (this.questions !== []) {
return {
allQuestions: this.questions.length,
answeredQuestions:
this.questions.reduce((count, currentQuestion) => {
if (currentQuestion.userAnswer) {
// userAnswer is set when user has answered a question, no matter if right or wrong
count++;
}
return count;
}, 0),
correctlyAnsweredQuestions: this.questions.reduce(
(count, currentQuestion) => {
if (currentQuestion.rightAnswer) {
// rightAnswer is true, if user answered correctly
count++;
}
return count;
},
0
),
};
} else {
return {
allQuestions: 0,
answeredQuestions: 0,
correctlyAnsweredQuestions: 0,
};
In this code, ‘score()’ uses a reducer array prototype to reduce the current questions array to a n number.
9. Display score
Run:
new Vue({
// …
methods: {
// …
// Return “true” count in userResponses
score: function() {
return this.userResponses.filter(function(val) { return val }).length;
}
}
});
10. Create the final page with total score
Run:
<div id=”app”>
<h1>{{ quiz.title }}</h1>
<div v-for=”(question, index) in quiz.questions”>
<!– //… –>
</div>
<!– Last page, quiz is finished, display result –>
<div v-show=”questionIndex === quiz.questions.length”>
<h2>
Quiz finished
</h2>
<p>
Total score: {{ score() }} / {{ quiz.questions.length }}
</p>
</div>
</div>
After this you can add the quiz final page with total score by running:
<div id=”app”>
<h1>{{ quiz.title }}</h1>
<div v-for=”(question, index) in quiz.questions”>
<!– //… –>
</div>
<!– Last page, quiz is finished, display result –>
<div v-show=”questionIndex === quiz.questions.length”>
<h2>
Quiz finished
</h2>
<p>
Total score: {{ score() }} / {{ quiz.questions.length }}
</p>
</div>
</div>
Your end page will look like this.
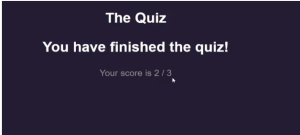
And voila! You should have your quiz. You can hire front-end developers to build other UIs and single-page applications for different purposes.


